Tampilkan postingan dengan label Italian. Tampilkan semua postingan

Rabu, 07 November 2012

Olive Garden Breadsticks Copycat Recipe


I recently posted an Olive Garden soup recipe that I love (my Pasta e Fagioli copycat recipe) and realized I needed to post a breadstick recipe to go along with it. These breadsticks are deliciously soft and fluffy, with just the right amount of chew and they taste just as delectable as the real thing. According to this source I found online the Olive Garden uses margarine to coat their breadsticks. With that said, if you prefer butter over margarine (like me) then feel free to use that instead. Now you can enjoy bottomless breadsticks at home =)!  

Olive Garden Breadsticks {Copycat Recipe}
Yields 1 dozen

Ingredients:
1 cup + 2 Tbsp warm water (110 - 115 degrees)
1 1/4 tsp active dry yeast
2 Tbsp granulated sugar, divided
3 - 3 1/4 cups all-purpose flour
1 3/4 tsp salt
3 Tbsp vegetable oil

Topping:
2 Tbsp margarine or butter*
1/2 tsp salt
1/4 tsp garlic powder

Directions:
In the bowl of an electric stand mixer, whisk together warm water, yeast and 1/2 tsp granulated sugar until yeast has dissolved. Allow to rest 10 minutes. Add in remaining 1 Tbsp + 2 1/2 tsp granulated sugar, 1 1/2 cups flour, 1 3/4 tsp salt and vegetable oil, then fit mixer with paddle attachment and blend mixture until well combine. Switch mixer to dough hook attachment, add in remaining 1 1/2 cups flour and knead mixture on low speed, adding up to 1/4 cup additional flour as needed, and knead until dough is smooth and elastic (dough should pull away from sides of the bowl but should still be slightly sticky). Transfer dough to a large buttered mixing bowl, cover with plastic wrap and allow to rest in a warm place free from draft until double, about 1 1/2 hours.
Punch risen dough down, divide into 12 equal portions (2 ounces each by weight), keep them covered with plastic wrap as you work. Roll each piece into a 9 inch rope on a lightly floured surface, then transfer to two Silpat lined or buttered cookie sheets. Cover and let rise 1 hour. Preheat oven to 425 during the last 10 minutes of rising. 
Bake in preheated oven 11 - 13 minutes until golden (I actually broiled mine during the last minute for a perfectly golden crust). Meanwhile, in a small bowl whisk together 1/2 tsp salt and garlic powder. Remove breadsticks from oven and run a stick of margarine or butter over hot breadsticks and immediately sprinkle with salt mixture. Serve warm or allow to cool and store in an airtight container.

Recipe Source: Cooking Classy

Selasa, 06 November 2012

A Simple Spaghetti Sauce


Spaghetti with meat sauce is one of my favorite Italian Classics. I grew up on it. I decided to post a second version in case you don't have 5 - 8 hours to tend my other recipe as it simmers. I myself don't always have that much time to wait, so when I don't I often use a jar of marinara sauce and just doctor it up a bit. A jar of spaghetti sauce can definitely come in handy when needed, but to me they just lack flavor. All it takes is a few fresh ingredients along with some dried herbs and you've got a spaghetti sauce worthy of an Italian restaurant. I love a simple weeknight meal that pleases everyone and this simple sauce is sure to do just that. Enjoy!


Simple Spaghetti Sauce
Yields about 4 - 6 servings

Ingredients:
1 (24 oz) jar marinara sauce*
3/4 lb lean ground beef
2 Tbsp extra virgin olive oil
1 - 2 cloves garlic, minced (I love garlic so I use 2)
1 Tbsp chopped fresh basil, plus more for garnish
1 tsp dried parsley
1/2 tsp dried thyme
1/2 tsp dried rosemary, crushed
salt and freshly ground black pepper, to taste
shredded Parmesan, Romano or Mizithra cheese, for serving (optional)

Directions:
Heat 1 Tbsp extra virgin olive oil in a large non-stick skillet over medium-high heat. Crumble beef into hot oil and cook, stirring occasionally and breaking up beef as you stir, until browned. Drain fat from beef (I like to process the drained, browned beef in a food processor for about 5 seconds so it's finely ground but it's not necessary). Return browned beef to skillet, add marinara sauce, remaining 1 Tbsp extra virgin olive oil, minced garlic, chopped basil, parsley, thyme, rosemary then season with salt and pepper to taste. Bring mixture just to a gentle bubble, then reduce heat to a simmer, cover saucepan and allow to cook 20 - 30 minutes, stirring occasionally. Serve warm, tossed into or spread over pasta, then garnish with shredded cheese and fresh basil ribbons. 

*I recommend Classico or Barilla. I think many of the others have too much sugar or corn syrup in them and they taste as such. 

Recipe Source: Cooking Classy

Jumat, 26 Oktober 2012

Cannoli Cupcakes


All the deliciousness of a cannoli without the frying mess!? Yes indeed. These cupcakes are complete and utter bliss! I have a total weakness for cannolis so I was so excited to see they come in cupcake form. I love all things pastry and all things cupcake and these are the best of both worlds combined into one decadent, out of this world dessert. These are deliciously indulgent and perfectly dainty. They are fancy enough that I felt it was an occasion worth getting out my Grandmother's fine china set, sipping milk out of a tea cup and gently using a fork as if I were a Queen. That is until after one bite, I quickly forgot that fancy mannered moment and rather wanted to drop my fork and shove the entire cupcake in mouth and devour all of it in it's entirety without leaving a smidgen of a crumb behind. And then steal everyone else's. Yes just that good. These are one of the best cupcakes I've ever had and they will definitely be going on my list of favorite cupcakes that I will make time and time again. I think I'm going to want this in layered cake form for my birthday garnished with a few of the real thing.
If you haven't tried Mascarpone cheese (which makes up half the cannoli filling for the cupcake) then you must! It is the most heavenly cheese made. The texture and taste are somewhat similar to cream cheese yet so much better. It's fluffy and soft, with a light buttery sweetness to it. I could eat it by the spoonful. It's an Italian cheese so you will likely find it in the specialty cheese section of many grocery stores. The cost is about twice that of cream cheese but sometimes a little splurge is definitely worth it. Enjoy!  


Then one up close and personal pic. 
Wanna bite? I know I do.

Cannoli Cupcakes
Yields 1 dozen

Ingredients:
1 1/2 cups all-purpose flour
1 1/2 tsp baking powder
1/4 tsp salt
1 cup granulated sugar
1/2 cup salted butter, at room temperature
2 large eggs
1 1/2 tsp vanilla extract
1/2 cup sour cream

2/3 cup Mascarpone cheese
2/3 cup Ricotta cheese, strained slightly*
5 Tbsp powdered sugar

1 1/2 cups heavy cream
1/2 cup powdered sugar
2 Tbsp cocoa powder
1/2 tsp vanilla extract

3 Tbsp mini semi-sweet chocolate chips, for garnish

Directions:
For the cupcake ~ Preheat oven to 350 degrees. In a mixing bowl, whisk together flour, baking powder and salt, set aside. In the bowl of an electric stand mixer fitted with the paddle attachment, whip together butter and sugar on medium high speed until pale and fluffy, about 3 - 4 minutes, occasionally scrapping down the sides of the bowl. Stir in eggs one at a time mixing until combine after each addition. Mix in sour cream and vanilla. With mixer set at low speed, slowly add dry ingredients and mix just until combine, scraping down sides and bottom of bowl as needed. Divide batter among 12 paper lined muffin cups, filling each cup about 2/3 full (about 1/4 cup batter per each). Bake in preheated oven 21 - 24 minutes until lightly golden and toothpick inserted into center of cupcake comes out clean. Allow to cool several minutes before transferring to wire rack to cool. Cool cupcakes completely.

For the cannoli filling ~ In a small mixing bowl, using a rubber or silicone spatula, blend together Mascarpone and Ricotta cheese while running and pressing mixture along bottom of bowl to create a smooth texture while removing any lumps. Add in 5 Tbsp powdered sugar and mix until well blended.

For sweetened chocolate whipped cream ~ In a mixing bowl, using an electric hand mixer set on low speed, blend together heavy cream, 1/2 cup powdered sugar, cocoa and vanilla until combine. Increase mixer to medium-high speed and whip until stiff peaks form. 

To assemble cupcakes ~ Spread about 1 1/2 Tbsp cannoli filling over the top of each cupcake, then pipe sweetened chocolate whipped cream over cupcakes. Garnish with mini chocolate chips. Serve within the next 3 hours (as the whipped cream will begin to break down after that). Store in refrigerator in an airtight container.

*Measurement taken before straining. To strain, I just placed the ricotta onto a layer of clean paper towels then wrapped it up and squeezed to strain out the liquids, then did this same step once more with a new batch of paper towels. You don't need all of the liquid removed just some of it. I used part skim Ricotta but whole milk Ricotta works too.

Recipe Source: adapted slightly from Tide and Thyme who adapted it from Fabulicious! by Teresa Giudice

Senin, 22 Oktober 2012

Caprese Lasagna Roll Ups


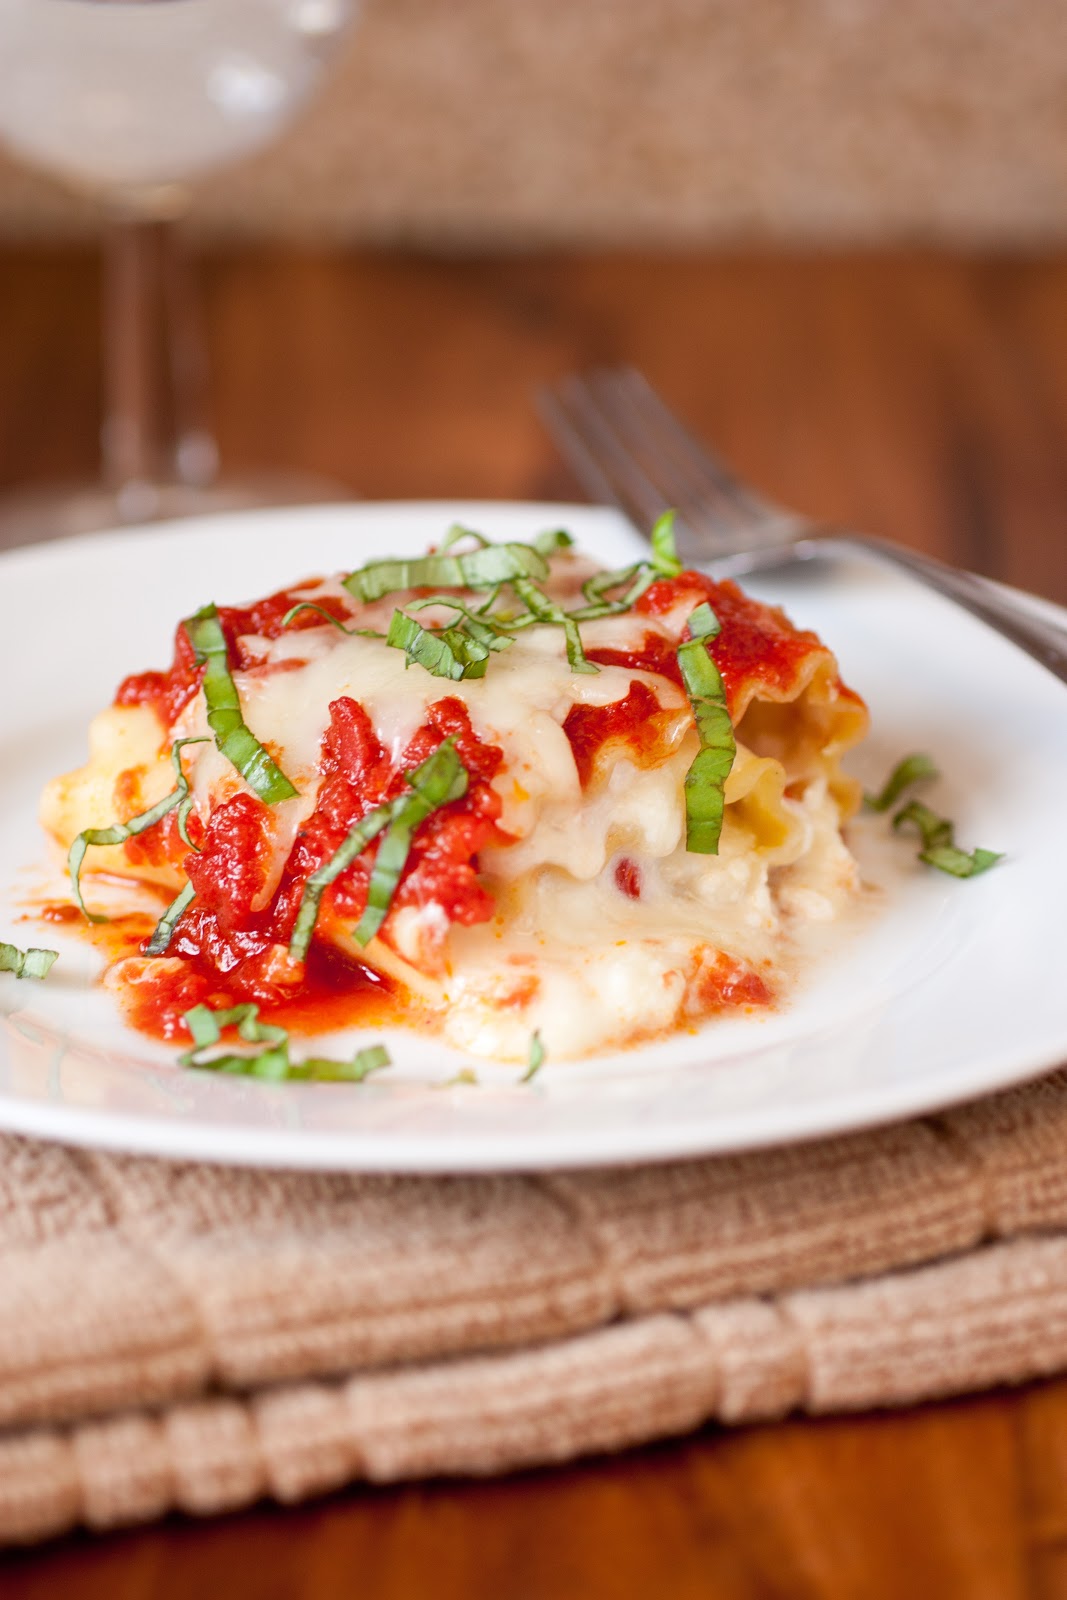
Aww, just look at all the gooey, soon to be stretched and strung (upon my no longer empty fork) cheese and dream of what could be yours =)! Italian comfort food at its finest.
The saying third times a charm, it's true. Yes this is my third attempt at creating what I'd envisioned, and at last a beautifully delicious success. 
The first time I tried Chicken Caprese lasagna roll ups - strange texture and not my favorite flavor, the second time around I omitted the chicken and made them using fresh Mozzarella - far to soupy and (I was expecting some liquid but I'm telling you half the baking dish was filled with the liquid from the fresh Mozza). The texture of the fresh Mozzarella seemed a little gummy when it melted too. So, the third time I went with a more traditional cheese feeling with the average low-moisture part skim Mozzarella cheese and lots of it, a bit of Parmesan for flavor and a little Ricotta for texture and glueage (I know that's not a word, but I say it should be). The egg white also helps glue and bind the mixture together, I decided to omit the yolk because I wanted to keep my cheese filling nice and white so it has that Caprese-y look. Besides, omitting the egg yolk is my attempt at making them healthier. That's laughable I know. I say cheese = calcium, so this is somehow good for me =). 
This dish has everything you find in the traditional Caprese flavors and many of the traditional lasagna flavors. Really this is lasagna simplified both in flavor and preparation. With that I don't mean to say their flavor is bland and boring, they are just simple yet incredible flavors. To create the Caprese style filling, you begin with a cheese filling that's mostly Mozzarella, then it's layered with fresh Roma tomato slices and sprinkled with fresh basil. Then you roll it up and top it with a simple marinara sauce made from crushed Roma tomatoes, and you sprinkle over more Mozzarella cheese, bake it and then garnish it with fresh basil ribbons. So, they are Caprese inside and out. I love the fresh flavors of this entree and all that heavenly cheese of course! Who knew vegetarian could be so good? Enjoy!


This is how the layering should look, this was attempt 2 with fresh Mozzarella (which I highly don't recommend). I just didn't want to take a third round of pictures of the prep, so the only difference when you make them will be the use of shredded mozzarella rather than the fresh Mozzarella in the bottom layer. The top picture was end result of recipe listed.


Caprese Lasagna Roll Ups
Yields 8 servings

Ingredients:
8 lasagna noodles, uncooked
14 oz freshly shredded, low-moisture part skim Mozzarella cheese, divided
3/4 cup Ricotta cheese
1 large egg white
1/3 cup freshly, finely shredded Parmesan cheese (about 1 1/4 oz)
freshly ground black pepper
3 - 4 medium Roma tomatoes, thinly sliced (about 1/6 inch thick slices)
1/4 cup chopped fresh basil, plus more for garnish
1 cup Simple Marinara Sauce, recipe follows 

Directions:
Preheat oven to 350 degrees. Cook pasta according to directions listed on package to al dente. Drain pasta (DO  NOT rinse with water) and align lasagna noodles in a single layer on a large sheet of parchment or wax paper.
For filling, in a large mixing bowl, whisk together ricotta cheese and egg white until well blended. Stir in Parmesan cheese. Mix in 12 oz. of the Mozzarella cheese and season with black pepper to taste (I wouldn't recommend seasoning with salt just because the cheeses already have plenty of salt). 
Place 1/4 cup of the cheese mixture over each lasagna noodle and spread into an even layer, going from one end of the lasagna to the other. Align 4 thin tomato slices over cheese mixture then sprinkle fresh basil over top. Snugly roll lasagna noodles to opposite end. Spread about 1/4 cup pasta sauce in the bottom of an 11 x 7 inch baking dish. Align lasagna roll ups, seam side down in dish. Top each roll up with about 2 Tbsp of the pasta sauce (covering edges of pasta so they don't dry out while baking). Sprinkle top with remaining 2 oz. shredded Mozzarella. Bake in preheated oven 30 minutes. Remove from oven, plate pasta and garnish with plenty of basil ribbons. Serve warm.


Simple Marinara Sauce
2 Tbsp extra virgin olive oil
1/4 cup finely chopped yellow onion
2 cloves garlic finely minced
1 (28 oz) can crushed tomatoes
salt and freshly ground black pepper to taste


Directions:
Heat olive oil in a medium saucepan over medium high heat. Add onions to hot oil and saute about 3 minutes until soft, adding garlic during last minute of sauteing. Pour in crushed tomatoes and season with salt and pepper to taste. Bring mixture just to a boil, then reduce heat to a simmer and allow sauce to cook for about 25 - 30 minutes (which will allow some of the water in crushed tomatoes to evaporate) while you prepare pasta and lasagna filling (you can freeze or refrigerate left over sauce in a small airtight container for later use, adding fresh basil if desired).

Recipe Source: Cooking Classy

Sabtu, 20 Oktober 2012

Pasta with Browned Butter and Mizithra (Must Try 15 Minute Meal!)


Who doesn't love a quick and simple meal that wows? This Pasta with Browned Butter and Mizithra cheese can be made in 15 minutes, yes 15 minutes, and its a recipe you are going to want to keep for life. 
In my opinion one of the best entrees you can get at the Old Spaghetti Factory is their Spaghetti with Mizithra and Browned Butter. It is simply amazing! But, why go there and spend $11 for one when you can feed a family of 4 the same meal for less than that at home? It's funny to me posting such a simple recipe because it's so simple you don't need a recipe for it, this is more sharing the idea if you haven't yet tried it. 
Another great thing about this meal is that it pleases everyone, from the gourmet sleuth to your pickiest eater. No one can deny the delicious flavors of this pasta. And "Mizithra," isn't it just fun to say?
You can serve this garnished with chopped fresh parsley like they do at The Old Spaghetti Factory but I really don't think it needs it, it's more for looks. I would also say no salt is needed because the Mizithra brings enough salt to the dish. You could add in more fillers like roasted garlic, sauteed bread crumbs, fresh lemon juice/zest or fresh basil but really this meal is perfect with it's three simple ingredients. You can find Mizithra cheese in the specialty cheese section of most grocery stores (which is usually near the produce section) or at Greek specialty stores. This is comfort food at it's simplest and best. Some days you just need some delicious carbs. Enjoy!


Pasta with Browned Butter and Mizithra
Yields about 3 - 4 servings, recipe can easily be doubled

Ingredients:
8 oz. spaghetti or fettuccine pasta 
1/2 cup salted butter, sliced into pieces
3 oz finely grated Mizithra cheese, or to taste

Directions:
Cook pasta according to directions listed on package (I'd recommend beginning with very hot tap water to boil the pasta as this will cut the time you have to wait for the water to boil). Meanwhile, place butter in a light-colored, small saucepan over medium heat. Cook butter, swirling pan occasionally, until it has browned (begin with sliced butter to ensure even melting. Here are the stages of to browning butter: the butter will first melt, it will become lemony yellow and after a minute or two it will begin to splatter a bit - I swirl the pan most during this stage to reduce splattering, then it will foam and begin to smell nutty, then little brown specks will begin to appear in the center of the golden foamy bubbles - this is when you remove it from heat, I wait just a few seconds for a generous amount of specs maybe a 2-inch circle before removing from heat. Color wise it should go from a yellow, to golden tan, to an orange-y toasty golden brown). 
Drain cooked pasta well (DO NOT rinse the pasta with water or the butter won't stick). Plate pasta, pour browned butter over pasta (sediments on bottom and all), sprinkle with Mizithra cheese and toss if desired to evenly coat. Serve immediately, you can also serve it with fresh cracked black pepper and chopped fresh parsley if desired (I don't think any salt is needed because the Mizithra is a pretty salty cheese).

Recipe Source: Cooking Classy, inspired by The Old Spaghetti Factory

Selasa, 02 Oktober 2012

Peach Cookies {That Look Like a Real Peach!}


I love when I can combine art and food because I've always been so passionate about each of them. These cookies are the perfect combination of both. And when food is prettier doesn't it just taste better =)? I've seen different versions of these cookies roaming around Pinterest and I'm so excited I finally got around to trying them. I noticed some recipes called for vegetable oil and others called for butter. I'm all about the butter version because butter makes everything better doesn't it?
I made a few slight alterations to the original recipe, from Cafe Chocolada, such as adding a few extra tablespoons of sugar in the cookie dough mixture. I used half brown sugar (rather than all granulated) and added vanilla extract to add another slight layer of flavor. I think salt is almost always a must for cookie dough so I added a tad and used salted butter. Then I opted to paint the cookie rather than dip it in colored milk. I dipped the first one and it was too soggy even after a quick dip in the milk (plus painting the cookies requires less milk, and the more milk you use the more diluted the color will be or the more food coloring you will have to add to get a vibrant color. So this method required less of each).
These cookies were so fun to make and decorate. I was in my zone where two of my favorite hobbies collide =). Although you don't need to be an artist to make these, they are actually really simple. The other great thing about these cookies is that not only do they look like peaches but they have that delicious, sweet peach flavor thanks to the peach jam sandwiched between them. You could even use Nutella and make a small "pit" (simply combine some Nutella with the crumbs you removed for the pit). I think next time around I may even add a few drops of raspberry extract to the milk mixture because I love the peach raspberry combo. Enjoy!


Peach Cookies
Yields about 17 sandwiched cookies (34 singles)

Ingredients:
1 1/2 cups all-purpose flour
1 3/4 tsp baking powder
1/4 tsp salt
10 1/2 Tbsp butter, softened
1/3 cup granulated sugar
1/4 cup packed light-brown sugar
1 large egg
2 Tbsp sour cream
3/4 tsp vanilla extract

Filling and Coating:
peach jam or preserves
6 Tbsp milk, divided
red and yellow food coloring
1/2 cup granulated sugar
fresh mint leaves, for garnish (optional)
you'll also need a clean paintbrush

Directions:
Preheat oven to 375 degrees. In a mixing bowl, whisk together flour, baking powder and salt, set aside. In the bowl of an electric mixer, fitted with the paddle attachment, cream together butter, granulated sugar and light-brown sugar on medium-low speed until well blended, about 1 minute. Mix in egg and vanilla. Add sour cream and mix until blended. With mixer on low speed, slowly add in dry ingredients and mix just until incorporated. Scoop dough out 1 even tablespoon at a time and with buttered hands roll dough into a ball. Place balls on cookie sheet (you can fit 15 per sheet but then you are left with 4 in the end so unless you were making a double batch it wouldn't matter to try and fit that many). Bake in preheated oven 14-15 minutes until bottoms are lightly golden brown. Transfer cookies to a wire rack to cool. Allow cookies to cool completely then spread about 1 teaspoon of peach jam evenly across the bottom of one cookie then gently press another cookie over the jam layer to sandwich them together. Repeat this process with remaining cookies.
To decorate cookies, pour 3 tbsp of milk into two small bowls. Tint one bowl of milk with red food coloring until it reaches a vibrant pink, then tint the other bowl of milk with yellow food coloring until its reaches a vibrant yellow. Take a paint brush and dip into the yellow tinted milk then paint randomly across both cookies leaving some areas unpainted. Then dip paintbrush into red tinted milk and paint randomly across unpainted areas and blend slightly (tip: I found the less milk I was able to paint across the cookie the better because then your cookies won't become soggy. You really don't need very much at all). Immediately after painting cookie, dip and coat entire cookie with sugar. Insert one or two fresh mint leaves into the side of each cookie if desired. Store in an airtight container.

Recipes Source: adapted slightly from Cafe Chocolada


Senin, 17 September 2012

Grilled Chicken Caprese Pasta


If you love Italian food then this is a deluxe meal you will most definitely want to try! It is fancy, loaded with fresh goodness, creamy, hearty and beyond good! You get everything that's on your average Caprese Chicken and so much more, with the tender pasta, fire roasted tomato sauce, additional garlic (because I think they never put enough garlic in the store bought bottled spaghetti sauce, you could even add two cloves to the recipe), and yes of course the perfectly grilled chicken breast strips. This is a meal you are going to remember. If you wanted to really splurge you could even add in some cooked Pancetta or Bacon, yum! Sorry I didn't get many pictures (I wanted more pictures with the grilled chicken showing through it's kind of hidden in there), this was my families Sunday dinner and I couldn't resist that ooey gooey cheesy goodness long. It was calling my name. I looked over to my husband and the cheese was dripping clear from the fork near his mouth to the plate sitting in his lap (yeah we ate this fancy meal on the couch, not usual but once in a while its fun =). Enjoy!


Grilled Chicken Caprese Pasta
Yields about 6 servings

Ingredients:
2 medium chicken breast halves, grilled and diced into strips*
9 oz Rigatoni or Penne pasta
2 cups fire roasted tomato pasta sauce (I used Classico)
1/2 cup heavy cream
1/3 cup finely grated Romano Cheese
1 clove garlic, finely minced
red pepper flakes, to taste (optional, for added heat)
Salt and freshly ground black pepper, to taste
1 pint grape tomatoes, diced into halves
12 oz fresh mozzarella, grated**
16 fresh Basil leaves, chopped chiffonade style (mine were fairly small)

Directions:
Preheat oven to 375 degrees. Cook pasta to al dente according to directions listed on package. While pasta is boiling, in a separate medium saucepan over medium low heat, heat tomato pasta sauce, heavy cream, Romano cheese, garlic, optional red pepper flakes and season with salt and pepper to taste. Cook, stirring frequently, until cheese melts. 
Drain cooked pasta well, return pasta to pot. Add in grilled diced chicken, grape tomatoes, half of the mozzarella and half of the basil ribbons, then pour warm sauce over mixture. Toss to evenly coat. Pour mixture into a greased casserole or baking dish. Sprinkle with remaining mozzarella and cook pasta uncovered for about 20 - 25 minutes until cheese is golden. Serve warm.

*This was about 1 lb chicken. I placed the chicken in a ziploc bag then pounded each breast to an even thickness, then removed and sprayed each chicken breast lightly with olive oil cooking spray. I seasoned each side with salt, pepper and a light sprinkle of garlic powder. Then grilled them until cooked through, cut them in half thick wise (like cutting a bun), and diced them into fairly thin strips.
**I've heard some people say they have trouble grating fresh mozzarella, I had no problem with this but if you do you can freeze it for 20 minutes prior to grating. They don't need to be perfect shreds its really just to break it up.

Recipe Source: adapted slightly from How Sweet It Is

Senin, 03 September 2012

Browned Butter Almond Pesto


Is there anything like the delicious taste and incredible scent of fresh, homemade pesto? If you've got basil in the garden at its prime then I think you're going to want to try this recipe. This definitely isn't your ordinary pesto. The typical pesto uses all extra virgin olive oil (rather than half olive oil half butter), pine nuts, no lemon juice and one type of cheese, which is usually Parmesan. I wanted to change things up and make new and exciting pesto, so I chose to add none other than one of my favorite ingredients, browned butter. Then I wanted to switch out the typical nut and use my favorite nut which is almonds. I also decided rather than using whole almonds to use almond butter because of it's smooth texture and light sweetness. Then for a very slight fresh tang I added a little squeeze of lemon juice. 
Spread this pesto over some freshly boiled pasta along with a light sprinkling of cheese and you'll create a meal worth remembering. So simple yet so divine. It's amazing what fresh basil and browned butter can do especially when combine together. Enjoy!


Not your average deep, vibrant green but it's sooo good...

Browned Butter Almond Pesto
Yields about 1 cup

Ingredients:
2 cups fresh basil leaves, lightly packed
2 large cloves garlic, minced
1/4 cup finely grated Romano cheese (1 oz)
1/4 cup finely grated Parmesan cheese 
2 Tbsp almond butter*
1/4 cup butter, browned and cooled until just warm to the touch**
1/4 cup extra virgin olive oil
1 light squeeze lemon juice
3 - 4 Tbsp warm water
Salt and freshly ground black pepper, to taste

Directions:
Add basil to a food processor and pulse a few times. Add garlic, Romano cheese, Parmesan cheese and almond butter, then with motor running, stream in butter and olive oil and pulse until well blended. Pulse in lemon juice and enough warm water to reach desired consistency. Season with salt and pepper to taste. Serve over your favorite pasta. Store in an airtight container in refrigerator up to 3 days.

*I used Maranatha brand, it has a little bit of added cane sugar in it which I thought complimented the natural sweetness of the basil, but you can use unsweetened almond butter instead. Alternately you could use whole roasted almonds, about 1/4 cup, just pulse them in the food processor several times before adding in the basil and other ingredients.
**After browning the butter, I poured it into a bowl and set the bowl over an ice bath and swirled the bowl and it cooled much quicker then just letting it rest at room temperature.

Recipe Source: Cooking Classy
Kamis, 26 Juli 2012

Crispy Pesto Parmesan Chicken


My all time favorite dressing is Old Spaghetti Factory's Creamy Pesto Salad dressing. I've made my own copycat version so I can enjoy it at home all the time. It is definitely a family favorite. Not only do I dress my salad with it but I use it the same way you'd use ranch, for example, to dip fries or pizza in or to drizzle over baked potatoes. When I serve it alongside a breaded chicken I always end up dipping my chicken in it too. That is why I decided just to create a recipe that incorporated it right in from the start rather than just dipping it. This is similar to a baked ranch chicken only with a Pesto salad dressing and some Parmesan instead of ranch dressing. Technically it should probably be called Crispy Pesto Dressing Parmesan Chicken (because it doesn't use pesto, but rather pesto dressing) but that's far to long so I went with the shorter version.
This chicken is so flavorful and delicious! I love the flavor of basil and it works wonders to this chicken. And that perfectly golden, crispy bread crumb coating that you get to sink your teeth into is incredible. Spaghetti Factory should consider adding it to their menu =). I love this as it is but I think sometime in the future I may even try it with a little bit of lemon zest. Enjoy!


Crispy Pesto Parmesan Chicken
Yields 4-6 servings


Ingredients:
4 (6 oz) boneless skinless chicken breast halves

1/4 cup mayonnaise
1/4 cup buttermilk
1 1/2 tsp dried basil
1/4 cup finely grated Parmesan cheese, divided
1/4 tsp garlic powder, divided
Salt and freshly ground black pepper, to taste
1/2 cup Panko bread crumbs
1/4 cup dry white bread crumbs
1/8 tsp onion powder
Olive oil cooking spray


Directions:
Preheat oven to 400 degrees. Butter a 13x9 baking dish. In a shallow bowl, whisk together mayonnaise, buttermilk, dried basil, 2 Tbsp Parmesan cheese, 1/8 tsp garlic powder and season with salt and pepper to taste, set aside. In a separate shallow bowl, whisk together Panko bread crumbs, dry white bread crumbs, remaining 2 Tbsp Parmesan cheese, onion powder, 1/8 tsp garlic powder then season bread crumb mixture with salt and pepper to taste. Dip chicken in basil (pesto) dressing mixture and coat both sides, then dip in bread crumb mixture and coat both sides (I'd recommend giving a generous dipping in each). Align coated chicken breast halves in a single layer on baking dish. Spray tops of chicken breast halves evenly with olive oil cooking spray. Bake chicken in preheated oven 30-35 minutes until cooked through (I wanted mine nice and golden so I moved the oven rack up a bit during the last minute of baking and broiled them. If you do this don't walk away from them, watch them constantly to prevent over browning). Serve warm.


Recipe Source: Cooking Classy

Sabtu, 21 Juli 2012

Browned Butter Lemon Pasta - A 15 Minute Meal


Yesterday I posted an Authentic Italian Meat Spaghetti Sauce so today I wanted to post a vegetarian Italian pasta dish. Trust me though you don't need to be vegetarian to fully appreciate this pasta. 
I didn't know exactly what kind of pasta I wanted to make, and then I realized I had some lemons I needed to use up while they were still fresh. Also, browned butter is a great way to add flavor to simple dishes so I decided why not combine the lemon with some browned butter. They seem as though they were made to go together. The great thing about this pasta is that it's elegant, full of fresh flavor, incredibly simple and it can be made in 15 minutes. Have guests over and impress them with this delicious, flavorful pasta. No one needs to know how easy it was =). Enjoy!


Who knew almonds made such pretty little flowers...


Browned Butter Lemon Pasta
Yields about 3-4 servings


Ingredients:
1/4 cup butter
2 Tbsp extra virgin olive oil
2 cloves garlic, finely minced
1/2 - 1 tsp lemon zest (use 1 for stronger lemon flavor)
2 Tbsp Italian seasoned bread crumbs
2 Tbsp lemon juice 
8 oz spaghetti noodles, uncooked
Salt and freshly ground black pepper to taste
2 oz freshly, finely grated Romano cheese (1/2 cup)
8 fresh basil leaves, chopped
1/4 cup sliced almonds (toasted if desired)


Directions:
Cook pasta according to directions listed on package. Meanwhile, brown butter in a small saucepan (for a tutorial on how to properly brown butter, see link here), set aside. Heat olive oil in a small skillet over medium heat. Stir in garlic and lemon zest and saute until lightly golden. Stir in bread crumbs and toast, stirring constantly, until golden (they will toast quickly), remove from heat. Pour garlic mixture into brown butter mixture along with lemon juice, and whisk to combine. Once pasta has cooked through, drain well and return to pasta pot. Pour browned butter mixture over pasta, season with salt and pepper to taste (I'd recommend being somewhat generous with the pepper), add romano cheese, basil and almonds and toss mixture to evenly coat. Serve warm (note that the lemon flavors will tone down and blend in after pasta has rested just a few minutes). 


Recipe Source: Cooking Classy

Jumat, 20 Juli 2012

Spaghetti with Meat Sauce - Authentic Italian Style


Do you want to mimic at home that amazing meat sauce they make in the Italian restaurants? Well look no further =). In my opinion I think there are a few key steps in creating that authentic, thick, richly flavored, meaty sauce. I've learned a few things trying to imitate that amazingly delicious pasta sauce that I get at a few of my favorite Italian restaurants. One of them being, you need to cook the sauce low and slow, 5 hours minimum. If you want great sauce you're going to have to have a little patience. This is one of those made with love recipes =). I think Roma tomatoes are best. A few weeks ago I made a similar sauce, entirely from scratch. I'm talking fresh Roma tomatoes, boiled, peeled, seeded and crushed them. It took far too much time and effort only to realize the next time around canned Roma tomatoes were better. They don't seem as acidic. The flavors of the fresh basil and parsley in this recipe lend it fresh from the garden flavor. I didn't want to use fresh herbs for the entire recipe (that would be pretty pricey if you don't have an herb garden) so I chose fresh basil and parsley because they are my favorites in this recipe. Be sure to brown the meat and veggies (brown, not burn), that browned flavor is an important part of the sauces rich, robust flavor. The carrot may seem like a random ingredient but I've heard that it adds a bit of sweetness to the sauce therefor you won't have to add any sugar. It also lends a good color. I know I packed a lot of herbs into this recipe, but it will help you use up those spices sitting in your spice cupboard before they lose their freshness. 
I hope you love these pasta sauce. I would highly recommend serving it up alongside a loaf of fresh Crusty Rustic Bread (it takes about 3 minutes to prepare the no knead dough) spread with whipped garlic butter, and possibly a simple side salad with a copycat recipe of Spaghetti Factory's Pesto Salad Dressing I love Italian food! Enjoy!


Spaghetti Meat Sauce

Ingredients:
1/4 cup extra virgin olive oil, divided
1 1/2 lbs lean ground beef (85% or 90%)
1 medium carrot, finely grated (about 1/2 cup)
1/2 medium yellow onion, finely diced (about 1/2 cup)
4 cloves garlic, finely minced
2 (28 oz) cans crushed Roma tomatoes (I recommend Contadina)
1/4 cup chopped fresh basil
2 Tbsp chopped fresh parsley
1 tsp dried rosemary, crushed
3/4 tsp dried thyme
1/2 tsp dried oregano
1/2 tsp dried marjoram
1/2 tsp dried sage
2 bay leaves
1/2 tsp salt, or to taste
1/4 tsp freshly ground black pepper
1/2 - 1 cup chicken or beef broth, to thin sauce if desired
freshly, finely grated Romano and Parmesan cheese or Mizithra cheese for serving

Directions:
In a large non-stick sauce pot, heat 1 Tbsp olive oil over medium high heat. Crumble ground beef into pot (approximately 1 inch pieces). Brown beef, stirring occasionally (I was always taught to stir constantly but this makes your beef gray, let it brown on bottom and only stir occasionally) and breaking up beef as you stir, until cooked through. Drain ground beef, reserving 1 Tbsp fat in pot. Place browned beef in a food processor and pulse until finely ground, about 15 seconds, set aside. 
Saute carrot and onion in reserved fat over medium high heat until golden, about 4 minutes, adding in garlic during the last minute of sauteing. Remove from heat (this will reduce splattering) and stir in 2 cans crushed Roma tomatoes, remaining 3 Tbsp extra virgin olive oil, basil, parsley, rosemary, thyme, oregano, marjoram, sage, bay leaves, salt, pepper and browned beef. Return pot to low heat and simmer uncovered, 5 - 8 hours (yes minimum of 5 hours), stirring occasionally. 
Add broth to sauce to thin sauce if desired (at about 4 hours sauce will be pretty thick so if you want it any thinner just add broth to desired consistency. Also, once it reaches the thickness you want you can cover it with a lid to reduce further condensation). Remove bay leaves and serve sauce warm over pasta garnished with grated cheeses and additional chopped fresh parsley or basil if desired.

Recipe Source: Cooking Classy

Senin, 28 Mei 2012

Crusty Rustic Bread (it's no knead!)


Everyone reading this, please, you need to make this bread! I'm telling you, this is the best loaf of yeasted bread I have ever made! I've baked many o' things, but funny thing until today I've never made my own loaf of no knead rustic bread. Seriously, why I have not tried it until now I can never tell you! I had no idea that such an incredibly quick and easy recipe could yield such amazing results. It is the perfect loaf of rustic bread, wonderfully crisp and chewy on the outside, while tender and even slightly moist on the inside. I can now officially say I've made a loaf of bread as good as a professional artisan bread baker thanks to the wonderful post over at Simply So GoodI'm so happy I found this recipe (from my countless hours of Pinterest gawking. Seriously I could spend my whole day on there, it's dangerous). Never again will I pay $5 to buy a loaf of rustic bread at the store or bakery. Astoundingly I liked this even better and it had to cost less than .50 cents to make. 
I also can't wait to try many different variations on this simple recipe. Thank you thank you to Simply So Good for posting such an amazing recipe. Head over there for step by step photos, mix in ideas and to browse through the over 1,000 comments posted (when I saw there were over 1,000 comments I knew this recipe had to be good). I hope this recipe becomes a staple in your home too!


Crusty Rustic Bread
Yields 1 loaf

Ingredients:
3 cups all-purpose flour
1 3/4 tsp salt
1/2 tsp active dry yeast
1 1/2 cups warm water (about 110 degrees)

Directions:
In a large mixing bowl, whisk together flour, salt and yeast. Pour in warm water and stir mixture with a wooden spoon until a shaggy ball forms. Cover bowl with plastic wrap and allow to rise for 12 - 18 hours (on the counter at room temperature).
Heat oven to 450 degrees. Once oven has reached 450 degrees, place a cast iron pot covered with lid into preheated oven, heat pot for 30 minutes. 
Meanwhile, turn dough out onto a heavily floured surface then shape dough into a ball. Cover dough with plastic wrap and allow to rest while pot is heating. Remove pot from oven and with floured hands, carefully drop dough into hot pot (you DON'T need to grease the pot) cover with lid, then immediately return pot to oven and bake 30 minutes (at 450 degrees). After 30 minutes, remove lid from pot and bake uncovered for 15 minutes. Remove from oven and allow bread to cool on a cooling rack. Once completely cooled, bread stores well in an open paper bag (it helps the bread maintain it's crisp crust. I wouldn't recommend storing it in an airtight container or ziploc bag).


Update 7/3/11: 
I made a wheat version of this with 1 1/2 cups whole wheat flour, 1 1/2 cups bread flour, 1 tsp salt, 1/2 tsp yeast, 2 Tbsp honey combine with 1 1/2 cups + 1/3 cup warm water and rise and cook according to directions listed. It was delicious!

Recipe Source: adapted from Simply So Good, thank you for such an incredible post!

Selasa, 01 Mei 2012

Manicotti - A Simple Yet Incredible Entree


This is one my favorite recipes that has been in my recipe book and made in my home countless times over the last 8 years. I originally saw the recipe on Food Network and have made my own adjustments, you can follow the link below to view the fully original recipe. This dish is also one of my mom's favorites. Every time she comes to visit this is always on the menu and she still get's excited every time I let her know it's what we are having for dinner or supper as she calls it =).
Who knew a vegetarian dish could be so good? I actually prefer this over lasagna. I usually serve it along with Parmesan or lemon chicken (so there goes vegetarian =) and a side of steamed brocolli, but if you aren't up to preparing a big meal this manicotti is filling enough to be a meal on it's own. This is cheesey, flavorful, generously filled pasta drenched in a simple yet incredible marinara sauce. Basically it's comfort food at it's best. To sum it up, it's simple, satisfying and a family favorite.
Note: the photo posted above is a half batch, prebaked and not fully covered in sauce (so you could see what the manicotti actually looks like). I often do a half batch for my small family. Sometimes I will do the full batch and freeze some. You could even do two half batches in two 8x8 pans and freeze one and immediately bake the other. For the frozen one thaw it overnight then bake in a cool (not preheated) oven at 350 for 55 minutes.

Once you add all the sauce it should look more like this...
yum yum, all that saucay goodness =)

Three Cheese Manicotti
Yields about 14 Manicotti

Ingredients:
1 (8 oz) pkg Manicotti noodles
1 (15 oz) container Ricotta Cheese (I've used both whole or part skim, either works)
1 lb freshly grated Mozzerella Cheese (about 4 cups)
3 oz finely, freshly grated Parmesan cheese (about 3/4 cup)
2 large eggs
1 1/2 Tbsp dried parsley
1/4 tsp freshly ground black pepper
1 Recipe Marinara Sauce, recipe follows

Directions:
Preheat oven to 350 degrees. Cook pasta according to directions listed on package and drain. In the meantime prepare Manicotti filling, in a large mixing bowl, using a fork blend together Ricotta cheese, eggs, parsley and pepper. Stir in grated Mozzerella and Parmesan cheese and mix until well blended. Divide cheese mixture evenly among the 14 manicotti noodles stuffing each one full (I just do this using clean hands, I hold one hand over the bottom opening of the manicotti noodle, then press cheese mixture into the noodle and slightly pack it in until the cheese mixture fills to opposite end). Align noodles in a single layer in a 13x9 baking dish. Pour marinara sauce evenly over filled manicotti noodles. Bake in preheated oven for 45 minutes. Serve warm.

Marinara Sauce:
1/3 cup extra virgin olive oil
2 cloves garlic, minced
2 (28 oz) cans crushed Roma tomatos (I prefer Contadina brand)
1 Tbsp dried basil
1 tsp dried parsley
Salt and pepper to taste

Directions:
Combine all ingredients in a large saucepan, simmer 20 minutes (I do this while preparing the manicotti filling and pasta).

Recipe Source: adapted slightly from Food Network